Click here to go back to RMC website.
|
You should have administrative access to your PC to do these steps. |
Important: These instructions contain steps that tell you how to delete files from Systems folder of your machine to resolve the issues with displaying images from Charleston County. However, serious problems might occur if you delete the files incorrectly or delete wrong files. Therefore, make sure that you follow these steps carefully. For added protection, make sure that when you delete the file it goes to Recycle Bin. Then, you can restore the files, if incorrect files were deleted by mistake.
Purpose: The main purpose of these instructions is to guide the users in properly deleting the ActiveX components mentioned in Step 11 and Step 13, from Windows System32 directory.
Instructions for Windows XP (All Versions)
The following steps need to be performed in sequence:
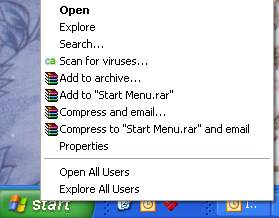
1. Start Windows Explorer. To do that, right click on Start button at the lower left corner of the taskbar and select Explore as shown below
![]()
2. Now system will open up a screen with “My Computer” as the title as shown below

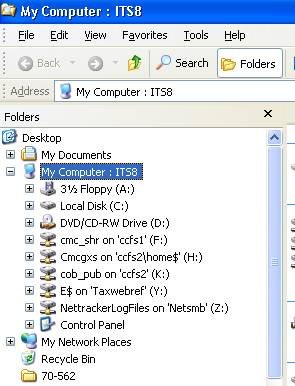
3. Now, in the Address location, type %WINDIR%\System32 and press Enter key
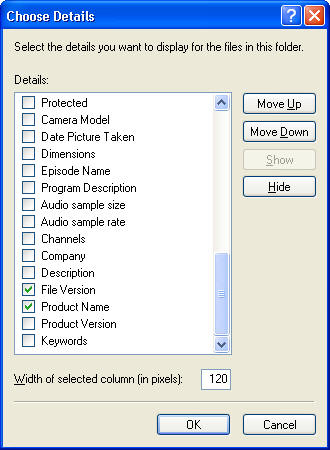
4. Now right click on the column header “Name” to show additional options, as shown in the figure in the next page

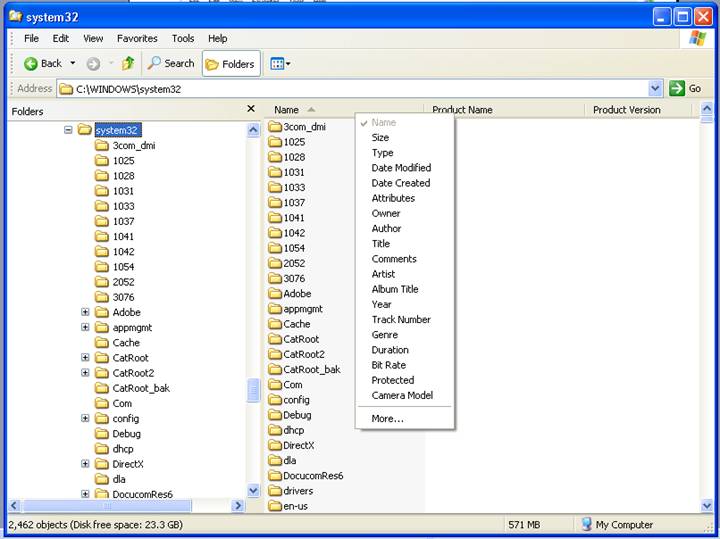
5. Click on More...
6. Uncheck Type, Size, Date Modified boxes to de-select the those options as shown in next figure

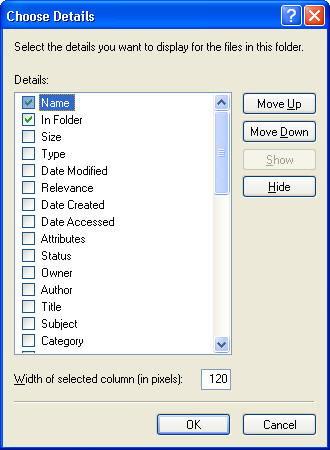
7. Scroll down and check File Version and Product Name boxes, as shown in next figure, and press OK button.
8. Now, click on View -> Explorer Bar -> Search, as shown in figure below


9. Now, system will show search options as follows

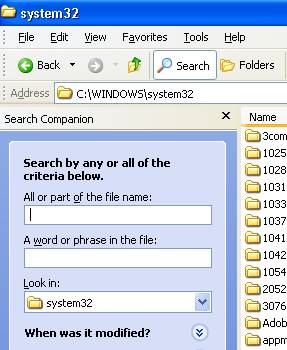
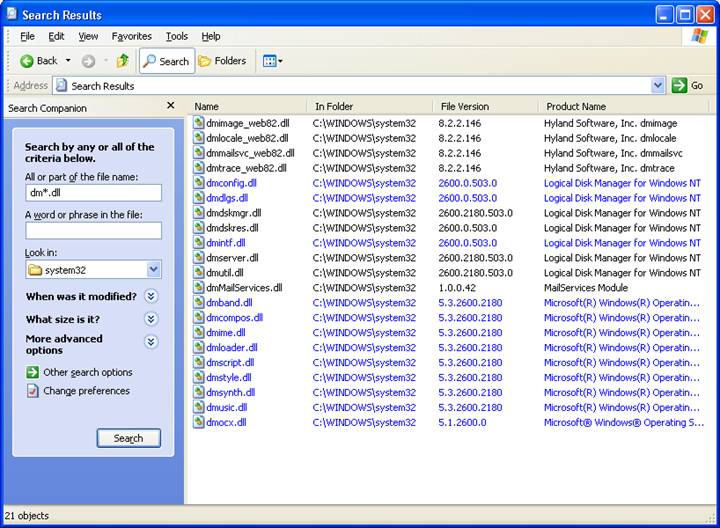
10. In All or part of the file name field, enter dm*.dll and click on search button
11. Now system will show the files, starting with dm. Look for the following files and, if found, delete them:
dmimage_web.dll
dmimage_web82.dll
dmlocale_web.dll
dmlocale_web82.dll
dmmailsvc_web.dll
dmmailsvc_web82.dll
dmtrace_web.dll
dmtrace_web82.dll
If you don’t find a file, that is okay; skip that file and go to next file.
12. Now, in All or part of the file name field, enter OBX*.ocx and click on search button
13. Now system will show the files, starting with OBX. Look for the following files and, if found, delete them:
OBXFileSvc.ocx
OBXFileSvc82.ocx
OBXPopupBlockerAssistant.ocx
OBXPrint.ocx
OBXPrint82.ocx
OBXScan.ocx
OBXScan82.ocx
OBXWebDocumentSelect.ocx
OBXWebDocumentSelect82.ocx
OBXWebPrint.ocx
OBXWebPrint82.ocx
OBXWebViewer.ocx
OBXWebViewer82.ocx
If you don’t find a file, that is okay; skip that file and go to next file.

14. Download the latest version of the ActiveX control from the location http://www.charlestoncounty.org/ActiveXControl/onbase_activex_8_2.msi
15. Follow the instructions of the setup program to install the correct version of the ActiveX control
16. Launch new Internet Explorer window, and then try viewing image