Judicial
Center
Remote Dial-out and Connecting to the Internet
The
Analog
phone lines marked 'voice' on the faceplates will allow you to dial-out to a
local or toll free number only.
Please see
attached directions for enabling your laptop to be connected to the Internet
through our network. Your laptop needs to be configured for DHCP in county's
network. Two sets of documents are attached for that purpose. Use the one that
matches the operating system of your laptop. If unsure of the operating system
on your laptop, you can confirm by following the steps below:
1. Click
on the START Menu, usually in the lower left of your screen.
2. Select
Settings
3. Select
Control Panel
4. Select
System
5. Select
the General Tab to view the Operating System information.
If you
need technical support, please contact YOUR IT advisor.
It is
advisable to write down the settings, as they may be required for connecting
your laptop to your office network.
This
access is provided as a courtesy to the public and to assist the members of the
bar. However, the
By use of
the County network, the user also acknowledges he/she is subject to
Setting DHCP
on a Win9X Machine
1
Start
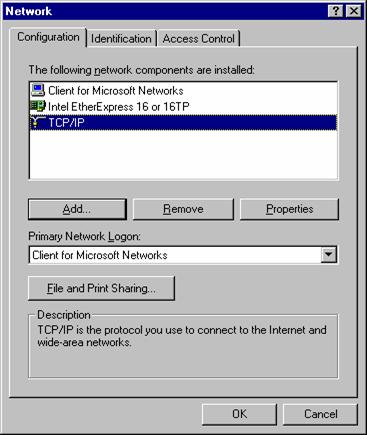
by clicking on “Start”, “Settings”, “Control Panel” “Network”
a) Make sure your network adapter is
installed.
b) You will need “TCP/IP”. To install click “Add” and then click
“Protocols” click “Microsoft” then “TCP/IP” then “Ok”.
2
Right-click
on “Network Neighborhood” and select “Properties”.
3
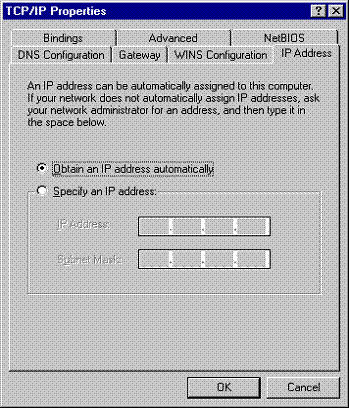
Make
sure that TCP/IP is highlighted and then click “Properties”. Take note of
any existing settings. Make sure you select “Obtain an IP address
automatically”.
4
Next
click on the “WINS Configuration” tab. Take note of any existing settings
and click the bottom option “Use DHCP for WINS Resolution”.
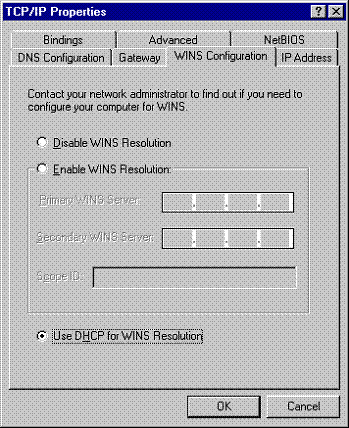
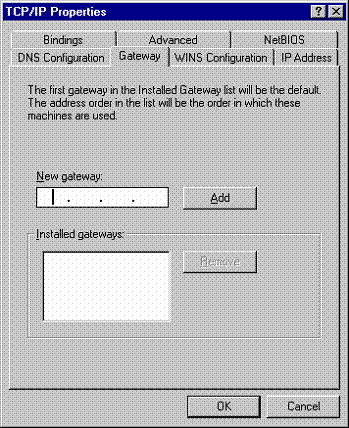
5
Next
click on the “Gateway” tab. Make sure
all settings are blank. Take note of any existing settings.
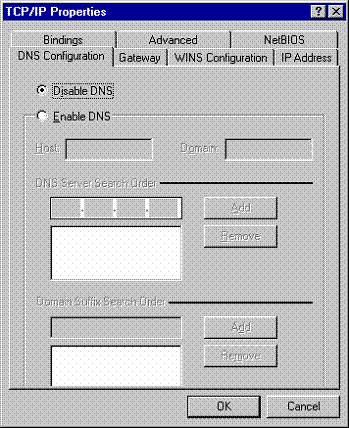
6
Select
“DNS Configuration”, take note of any
existing settings and click on “Disable DNS”. This completes the TCP/IP Properties
configuration.
For further assistance please contact your
internal IT department.
Windows 2000 and XP
Connectivity
(Please note: Information required for Windows 2000 is similar to XP except that some screens may look different.)
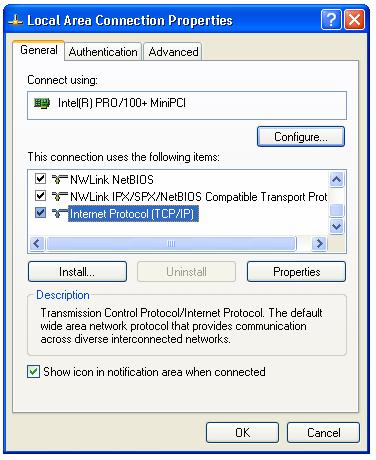
1. Select Start,
Control Panel, Network Connections, Local Area Connection, Properties.

2. Ensure that
your Network Adapter is installed. Select Internet Protocol (TCP/IP),
Properties.
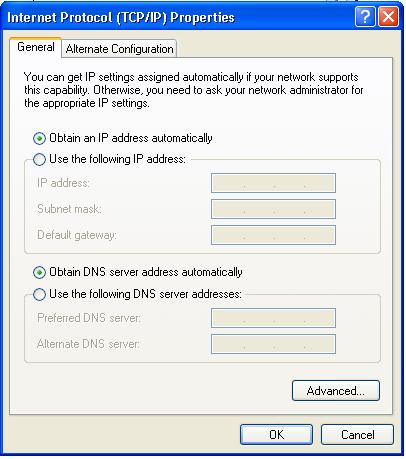
3. Take note of
any existing settings. Ensure that “Obtain an IP address automatically” is
selected. Ensure that “Obtain DNS server addresses automatically” is selected.
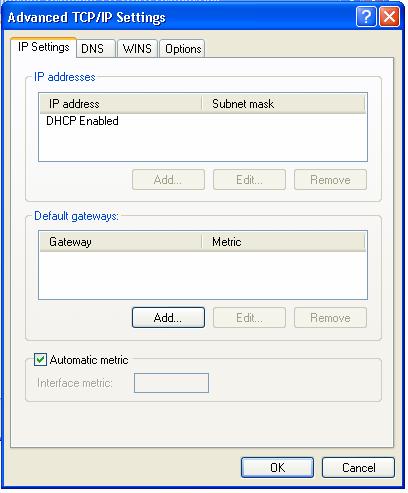
4. Select
Advanced. Take note of any existing settings. Ensure that DHCP is enabled.
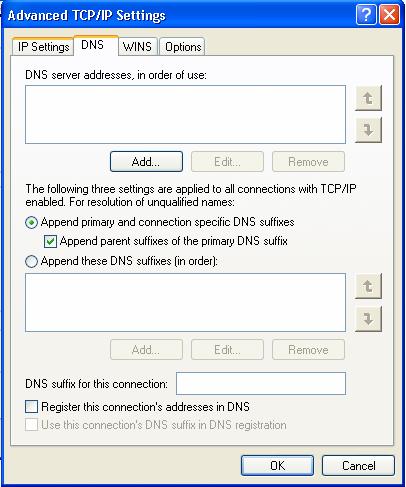
5. Select DNS. Take
note of any existing settings. Ensure that there are no DNS server address
entries.
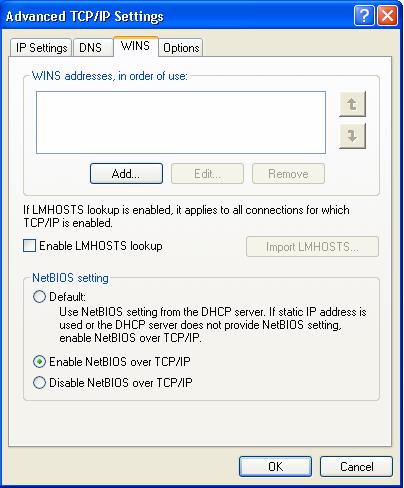
6. Select WINS.
Take note of any existing settings. Ensure that there are no WINS addresses
entered.